Recreating Quake / GoldSrc Movement in Godot 4.0
Created April 9, 2023About a year ago, I wanted to try making an FPS game using Godot 3.5. I really liked how the player movement in games like Half-life and Quake felt, so I wanted to recreate it. I spent a lot of time trying to figure it out, but I never really managed to get my head around it. Finally, I tried again, and this time I got something that I’m pretty happy with. It might not be perfect, as I still don’t really know what I’m doing, but I wanted to document what I’ve learned and share it.
This guide will cover how to implement just the character controls and nothing else. The system I’ve come up with has smooth movement and the “bug” that lets you bunny hop and surf like in Half-life. I assume you have a decent grasp of the fundamentals of Godot, and I won’t be explaining everything in complete detail. However, all the code and information you need to get it working for yourself should be on this page.
Here is a video example of the script working in game
If you would like to download the project files they are also available: FPS_Player_Controller.zip
Setup
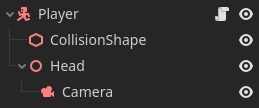
First, we need to set up our Player scene. It is just a CharacterController3D with a CollisionShape and a Node3D called “Head” which holds our camera.
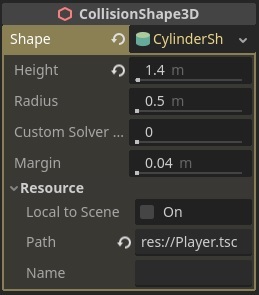
The CollisionShape3D is a CylinderShape with a height of 1.4m and radius of 0.5m. This is a rough approximation of the player height in Half-life based on the GoldSrc hammer units to real world meters. I’ve also decided to use a cylinder for the player shape even though Half-life uses a box because it seems to be slightly better at not getting stuck on world geometry, and it is usually the standard that I see nowadays.
*EDIT 2023-04-28: I’ve found that the CylinderShape is actually quite buggy and not as reliable as I initially thought. After a bit of testing, I recommend using a capsule instead as it seems to not suffer from any of the issues like the cylinder. I will update again if necessary.
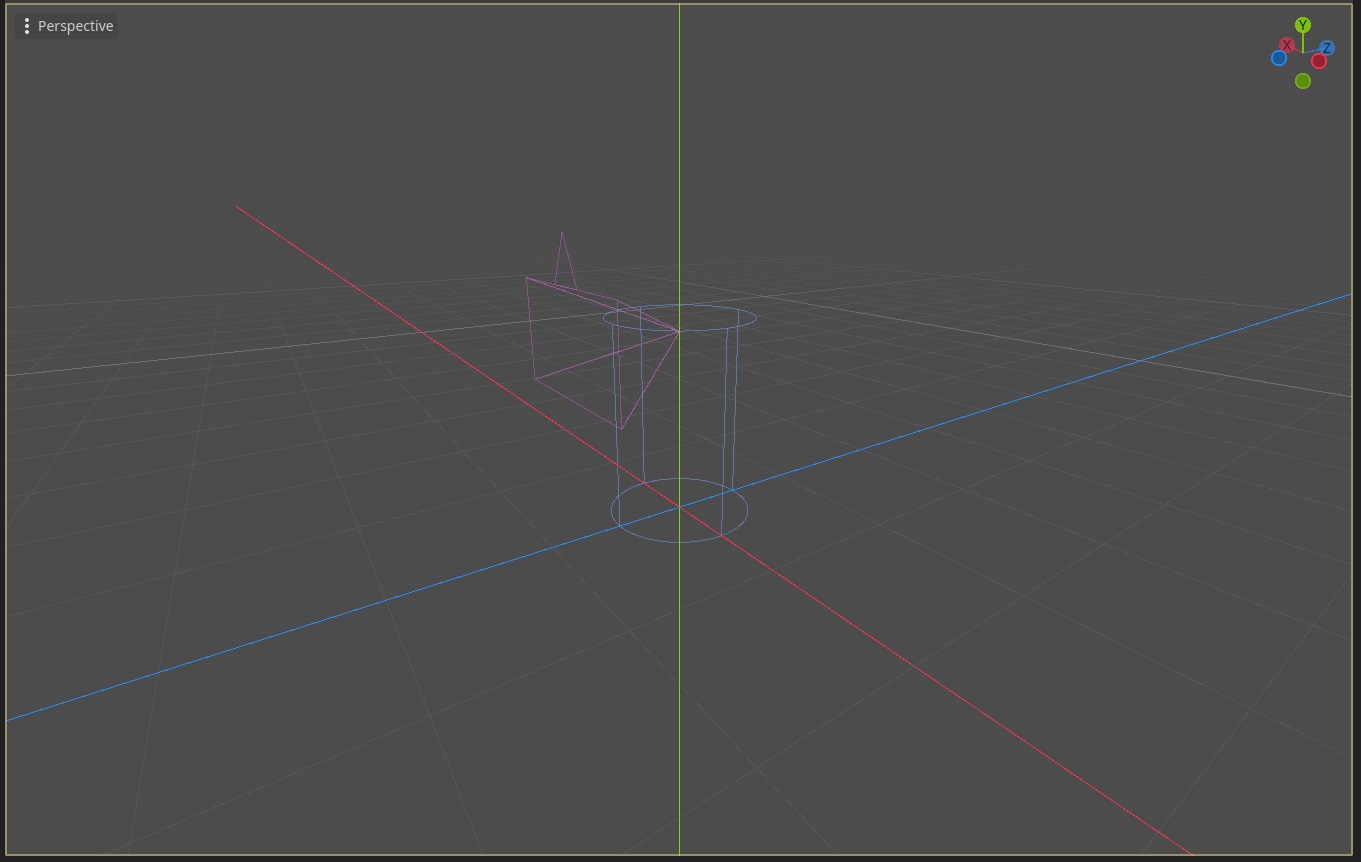
I’ve moved the head up by 0.6m to put it at around eye level. Also make sure that the camera is facing in the -z direction in order for the movement script to work correctly.
Now comes the fun part of creating the player movement script. This is put together from various online resource examining the Quake movement code as well as whatever I could decipher from the Half-life source code. The basis of the script is primarily from this article. Matt’s video was also incredibly helpful for understanding how bunny hopping even works in the first place.
So how does it work? Well, I’m not going to try to give a technical explanation as others have done it already and better than I could (refer to the links above). However, I will walk through how I’ve implemented it in Godot as best I can.
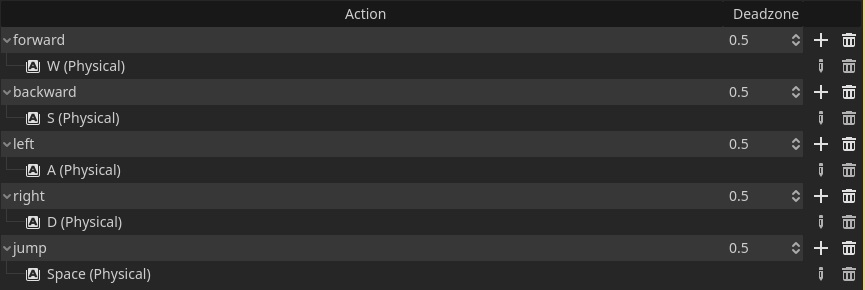
First of all, we need to do some basic set up for our game to work properly. In the project settings, we need a few input maps to get input from the player. I’ve added basic WASD controls and a jump button for now.
Now in our Player script we can add a few lines to lock the camera to the center of the screen.
func _ready():
	Input.set_mouse_mode(Input.MOUSE_MODE_CAPTURED)
Camera Rotation
For camera rotation we check if the input event is an InputEventMouseMotion and the mouse is captured. This is just to make sure the camera only moves when the mouse is actually captured in the center of the screen.
We rotate the player about the vertical y-axis so that the screen moves left and right. Then we rotate the Head about its x-axis so that it moves the camera up and down. We also clamp this rotation to stop the camera from flipping over. Each of these inputs is multiplited by a sensitivity modifier which can be adjusted to your liking.
# Camera
var sensitivity = 0.05

func _input(event):
	# Camera rotation
	if event is InputEventMouseMotion and Input.get_mouse_mode() == Input.MOUSE_MODE_CAPTURED:
		_handle_camera_rotation(event)

func _handle_camera_rotation(event: InputEvent):
	# Rotate the camera based on the mouse movement
	rotate_y(deg_to_rad(-event.relative.x * sensitivity))
	$Head.rotate_x(deg_to_rad(-event.relative.y * sensitivity))

	# Stop the head from rotating to far up or down
	$Head.rotation.x = clamp($Head.rotation.x, deg_to_rad(-60), deg_to_rad(90))
Input Direction
Next we check for input from each direction and add it to a direction Vector3 which keeps track of what direction the user is inputting. Forward is assumed to be towards the -z-axis and you have to make sure the camera is facing that way otherwise it’ll cause problems. This direction is reset every frame so that it remains up to date. We also keep track of whether the user is trying to jump by pressing the spacebar.
var direction = Vector3()
var wish_jump

func _physics_process(delta):
	process_input()

func process_input():
	direction = Vector3()

	# Movement directions
	if Input.is_action_pressed("forward"):
		direction -= transform.basis.z
	elif Input.is_action_pressed("backward"):
		direction += transform.basis.z
	if Input.is_action_pressed("left"):
		direction -= transform.basis.x
	elif Input.is_action_pressed("right"):
		direction += transform.basis.x

	# Jumping
	wish_jump = Input.is_action_just_pressed("jump")
Movement Velocity
Next is the slightly more complicated part. We have a bunch of new constants which will be used in the physics calculations. Most of them are fairly self explanatory but I will still go through them.
The MAX_VELOCITY_AIR and MAX_VELOCITY_GROUND are used to limit the maximum velocity which the player can travel. They technically don’t work as originally intended, however, they are still required to get the appropriate style of movement we are attempting here.
MAX_ACCELERATION is just a multiple of MAX_VELOCITY_GROUND and is used to bring the player up to speed in a relatively short time. I’ve made it 10 times greater, but you can adjust this to your liking. I believe these few are almost identical to the values used in Half-life, just in Godot units.
GRAVITY is self explanatory, but once again it’s an approximation of the units used in Half-life.
STOP_SPEED is used to bring the player to a stop once they are going slow enough.
JUMP_IMPULSE is an approximation of the function used in Half-life, and you can actually adjust the 0.85 to change how high the player can jump.
Also notice that we’ve added a new function in _physics_process(). Make sure to pass delta to the process_movement() function because we will need it for the physics calculations.
# Movement
const MAX_VELOCITY_AIR = 0.6
const MAX_VELOCITY_GROUND = 6.0
const MAX_ACCELERATION = 10 * MAX_VELOCITY_GROUND
const GRAVITY = 15.34
const STOP_SPEED = 1.5
const JUMP_IMPULSE = sqrt(2 * GRAVITY * 0.85)

var friction = 4

func _physics_process(delta):
    process_input()
	process_movement(delta)
I have simplified the function for clarity, but it basically boils down to checking if we’re on the floor, and updating our velocity based on whether or not we are. The update_velocity_ground() function applies friction which makes you slow down once you stop inputting a direction and update_velocity_air() has no friction but your input is heavily reduced.
func process_movement(delta):
	# Get the normalized input direction so that we don't move faster on diagonals
	var wish_dir = direction.normalized()

	if is_on_floor():
        velocity = update_velocity_ground(wish_dir, delta)
	else:
		# Only apply gravity while in the air
		velocity.y -= GRAVITY * delta
		velocity = update_velocity_air(wish_dir, delta)

	# Move the player once velocity has been calculated
	move_and_slide()
The following is what I had trouble with for the longest time. I have commented the code as much as possible, but I will also explain whatever I can here. The accelerate() function is used in both velocity functions, and just updates the velocity based on the direction (wish_dir) and max_velocity it is given. The only weird thing is that the current_speed is calculated in an unintuitive way.
“In the Quake III acceleration code, movement speed is limited in a very interesting and nonobvious way. Instead of limiting velocity directly, only the projection of the current velocity onto acceleration is limited.”
This is because of some math and technical limitations or something from the time, but I don’t really understand it so… You can read a technical explanation here. Just know that it is what allows us to exceed the max_velocity under certain circumstances like when bunny hopping.
Friction is also applied in a funky way but it’s not actually too complicated. As long as our speed is above the STOP_SPEED it calculutes some amount to reduce our velocity by and then does that. The amount of friction can be adjusted to change how quickly your character gets slowed down.
func accelerate(wish_dir: Vector3, max_velocity: float, delta):
	# Get our current speed as a projection of velocity onto the wish_dir
	var current_speed = velocity.dot(wish_dir)
	# How much we accelerate is the difference between the max speed and the current speed
	# clamped to be between 0 and MAX_ACCELERATION which is intended to stop you from going too fast
	var add_speed = clamp(max_velocity - current_speed, 0, MAX_ACCELERATION * delta)

	return velocity + add_speed * wish_dir

func update_velocity_ground(wish_dir: Vector3, delta):
	# Apply friction when on the ground and then accelerate
	var speed = velocity.length()

	if speed != 0:
		var control = max(STOP_SPEED, speed)
		var drop = control * friction * delta

		# Scale the velocity based on friction
		velocity *= max(speed - drop, 0) / speed

	return accelerate(wish_dir, MAX_VELOCITY_GROUND, delta)

func update_velocity_air(wish_dir: Vector3, delta):
	# Do not apply any friction
	return accelerate(wish_dir, MAX_VELOCITY_AIR, delta)
Jumping
Now after all this… if you try out the script in game you will be able to move around, but you can’t jump yet! So we have to make some adjustments that allow you to jump.
In our movement function, we add a new check to see if the player is attempting to jump. Now in Quake there is a single frame delay in which no friction is applied to the player because they are technically not on the ground yet, but they can still jump anyway. This lets you bunny hop if you can time it correctly. The best way I’ve found to emulate this in Godot is to check whether the player has just pressed the jump button and deliberatly not apply any friction for that frame.
We also apply the JUMP_IMPULSE on the player’s y-axis to send the upwards. If you try the game now, you should be able to bunny hop to your heart’s content.
func process_movement(delta):
	# Get the normalized input direction so that we don't move faster on diagonals
	var wish_dir = direction.normalized()

	if is_on_floor():
		# If wish_jump is true then we won't apply any friction and allow the
		# player to jump instantly, this gives us a single frame where we can
		# perfectly bunny hop
		if wish_jump:
			velocity.y = JUMP_IMPULSE
			# Update velocity as if we are in the air
			velocity = update_velocity_air(wish_dir, delta)
			wish_jump = false
		else:
			velocity = update_velocity_ground(wish_dir, delta)
	else:
		# Only apply gravity while in the air
		velocity.y -= GRAVITY * delta
		velocity = update_velocity_air(wish_dir, delta)

	# Move the player once velocity has been calculated
	move_and_slide()
Conclusion
Thank you for reading. I hope this was at all helpful, and best of luck on your game dev adventures. I’ve been trying to learn Godot for a while now, and with the release of 4.0 I have been even more excited to try and make some games. I’m kind of an idiot though, so I’m trying out making some blogs about the things I manage to create.
I would like to create a follow up to this with my own additions some time in the future so keep an eye out for that as well!